Importing images
In many respects, importing your images into your document using LaTeX is fairly simple... once you have your images in the right format that is! Therefore, I fear for many people the biggest effort will be the process of converting their graphics files.
Note: in this tutorial I am referring to importing with vanilla LaTeX, which is not necessarily the simplest approach due to the requirement of EPS files. To learn how to use the more typical JPG and PNG formats I'd recommend reading this tutorial through first, and then move on to the PDFs tutorial which gives a more convenient route using the 'pdflatex' command.
Encapsulated Postscript (EPS)
Basically, if you wish to import any images into your document using LaTeX, the file format needs to be EPS. EPS was defined by Adobe for making it easy for applications to import postscript-based graphics into documents. Because an EPS file declares the size of the image, it makes it easy for systems like LaTeX to arrange the text and the graphics in the best way.
Most decent graphics software has the ability to save images in the EPS format (extension is normally .eps). Obviously, Adobe applications do, since they developed the PS and EPS standards.
Converting images to EPS (in Linux)
There are so many utilities available on Linux for converting between graphics formats that you can be overwhelmed. There are plenty that are dedicated to converting a given format into EPS, jpeg2ps, for example. However, I shall cover a better, more generic piece of software, called convert
convert supports just about every graphics format that you care to mention, and its beauty is that it will let you convert to and from any format it understands. It is a command-line program, but is very simple to use. You pass two arguments, the first being the filename of your current image, and the second is the filename you wish to give your converted image. Normally, the only difference is in the extension. By default, convert will deduce the input and output formats by the file extensions you supply. For example:
convert graph.jpg graph.eps
This command takes the JPEG file, graph.jpg, and converts it to an EPS file of the same name. Of course, it would have worked equally well if your original image was a BMP, GIF, PNG, etc.
For a more graphical approach, try The GIMP, which allows you to visually load and save to plenty of image formats. It is so straight-forward that I don't feel it needs a walkthru!
Graphicx
OK, assuming that you can now easily get your images converted in to EPS, it is time to see the mechanisms for importing them in LaTeX. As with most things in LaTeX, there is more than one way to skin a cat. And then same is true for importing EPS files into your documents. However, I shall focus on a package called graphicx, which does this particular task quickly, and with little effort.
Before you any of the following commands will work, you need to put \usepackage{graphicx} in the preamble of your document.
The syntax for using graphicx is: \includegraphics[attr1=val1, attr2=val2, ..., attrn=valn]{image}
As you should hopefully be aware by now, arguments in square brackets are optional, whereas curly braces are compulsory. The variety of possible attributes that can be set is fairly large, and so I shall cover the most useful:
| width=xx | Specify the preferred width of the imported image to xx. |
| height=xx | Specify the preferred height of the imported image to xx. |
| NB. Only specifying one of the above will scale the image whilst maintaining the aspect ratio. | |
| keepaspectratio | This can be set to either true or false. When true, it will scale the image according to both height and width, both will not distort the image, so that neither width or height are exceeded. |
| scale=xx | Scales the image by the desired scale factor. e.g, 0.5 to reduce by half, or 2 to double. |
| angle=xx | This option can rotate the image by xx degrees (anti-clockwise) |
| trim=l b r t | This option will crop the imported image by l from the left, b from the bottom, r from the right, and t from the top. Where l, b, r and t are lengths. |
| clip | For the trim option to work, you must set clip=true |
NB. To use more than one option at a time, simply separate with a comma.
Examples
OK, it's time to see graphics in action. You are, as always, recommended to first look at the example files at the end of the tutorial. Look at the .tex file first, and then at the .pdf output. Here are some examples from the example import.tex file which imports an EPS image called chick.eps. Hopefully you'll notice in the following examples I do not use the full filename (chick.eps), but only the basename which doesn't include the .eps extension. LaTeX will infer the extension and this is significant for people who may wish to use pdflatex to generate their output (see PDFs tutorial).
\includegraphics{chick}
This imports the image, however, it is very large (so I won't display it here!). So, let's scale it down:
\includegraphics[scale=0.5]{chick}
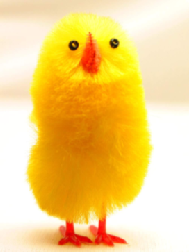
This has now reduced by half. If you wish to be more specific and give actual lengths of the image dimensions, this is how to go about it:
\includegraphics[width=2.5cm]{chick}

To rotate (I also scaled the image down too):
\includegraphics[scale=0.5, angle=180]{chick}
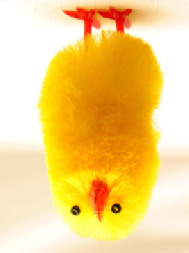
And finally, an example of how to crop an image should you wish to focus in one particular area of interest:
\includegraphics[trim = 10mm 80mm 20mm 5mm, clip, width=3cm]{chick}

Note the presence of clip, as the trim operation will not work without it.
Summary
That concludes just about all you need to know about how to import your images into a LaTeX document. As I said, the actual conversion is possibly the longest part of the whole process, since the command to include the image is straight-forward.
There is one major topic missing from this tutorial that is relevant, and that is to do with making that image a figure. So, you will want a caption, and maybe cross-reference. However, this was deliberate, as it is not only images that are figures. Therefore, this material is to be covered within it's own tutorial of its own. (See the Floats, Figures and Captions tutorial.)
Files:
import.tex |
import.pdf |
chick.eps
Useful resources:
Graphics Guide